Implementation
This section outlines the steps and considerations for your acquirer-level implementation of as part of your solution. The Partner Portfolio Overview provides additional information about portfolio ownership and functional usage.
Board Merchants with Unified Checkout
is a product within the acceptance platform. Portfolio owners must enable it for merchants using the boarding API or through the merchant boarding interface in the .
Contact your account or relationship owner if is not available within your portfolio.
Implementation Models
is designed to be flexible and supports multiple integration options for various deployment scenarios. The implementation models for include:
- Integrated directly into merchant web pages.
- Integrated into a partner's hosted checkout page.
Integrated Directly into Merchant Web Pages
is integrated directly by each merchant independently and simplifies acceptance on their unique web page.
Integration:
- The merchant embeds onto their e-commerce page.
- The merchant facilitates all the interactions with the APIs.
- The merchant generates and leverages the API keys.
Boarding:
- You board merchants using their transacting organization IDs to .
- Merchants must enroll in their desired digital payments through the , or you enroll merchants in digital payments through the on behalf of merchants.
- Merchants generate API keys to access APIs.
- Merchants integrate into their web page.
Integrated into a Partner's Hosted Checkout Page
You set up in a provider/reseller partner portfolio within a commonly developed application or hosted order page. This deployment serves multiple merchants using the same technology.
Integration:
- Unified Checkout is embedded by the partner onto their e-commerce application.
- The partner facilitates all the interactions with the APIs.
- The partner leverages a meta key to use a single key for all merchants.
Boarding:
- You board merchants using their transacting organization IDs to .
- Merchants must enroll in their desired digital payments through the , or you enroll merchants in digital payments through the on behalf of merchants.
- You generate meta API keys to access APIs.
Boarding API Integration
Enable for your merchants through the boarding API. Using this method, you send an API request to the system to set up a merchant without logging in to the .
The Integration section in the Merchant Boarding Guide provides information about using the boarding API for .
Boarding in the
Enable for your merchants through the . To add it while you are adding products for merchants, the system displays all available products to enable. Under the Payments section, find and select the enable toggle.
To add after creating the merchant account, go to Manage Merchants and select the appropriate transacting organization ID.
The Integration section in the Merchant Boarding Guide provides information about using the for boarding merchants for .
Digital Payments
When you enable for merchants, the merchant receives automatic enablement for all digital payment offerings within it. To use digital payments with , merchants enroll with each digital payment provider before integrating them in their checkout page.
- Enablement: the partner allowing access to the product for a specific merchant.
- Enrollment: the merchant or portfolio partner acting on behalf of the merchant enrolling in a digital payment option.
If you offer the Paze digital payment option for your merchants, enable it explicitly for each merchant because Paze requires the merchant to sign an agreement with their acquiring partner.
Paze Configuration for Unified Checkout
During merchant boarding in the , complete these steps to enable Paze:
- Click the Configure button for .
- Check the box for Paze.
- Check the Paze Configuration box.
The option to select an acquirer appears only if you support multiple Paze acquiring options. Select the acquirer with which the merchant has a Paze contract.
Enrolling Digital Payments
Manage digital payment enrollments in the . The enrollment process differs for each digital payment, depending on that digital payment's requirements for enrollment.
Enroll in Apple Pay
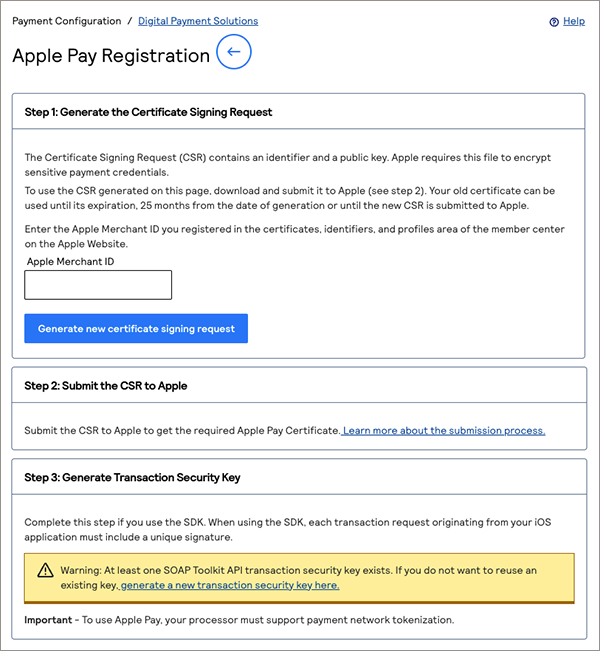
Enrolling in Apple Pay registers the merchant with Apple and adds the merchant's page to Apple's list of domains applicable for Apple Pay. Apple Pay enrollment requires validation of the merchant's domain. To enroll in Apple Pay, a merchant must download a public certification file and host it on the domain where they have placed in a public folder.
Follow these steps in the to enroll in Apple Pay:
- Log in to the .
- Go to Payment Configuration > .
- Click the Manage button.
- In the Apple Pay section, click the Manage button.
- Download the Apple Verification Certificate.
- Host the Apple Verification Certificate.
- Click Verify Domain to submit the request for verification.
Result: the Apple Pay enrollment page confirms successful enrollment.
Enroll in Click to Pay
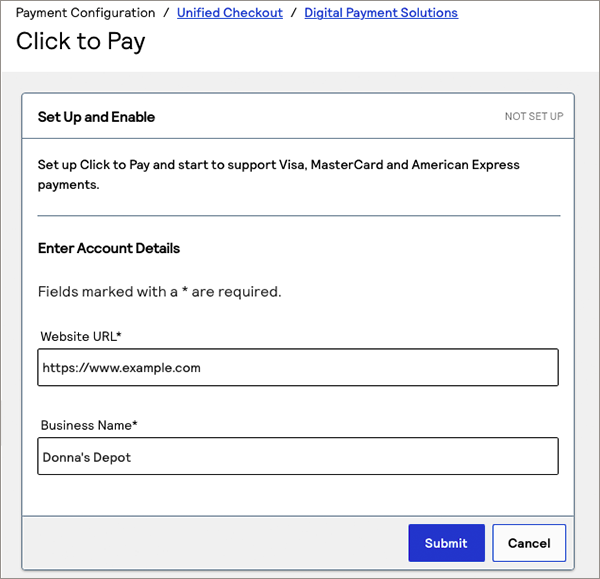
Merchants must enroll in Click to Pay before it functions in . This activity registers the merchant with Click to Pay services for Visa, Mastercard, and American Express.
Follow these steps to register the merchant with Click to Pay:
- Log in to the .
- Go to Payment Configuration > .
- Click the Manage button.
- In the Click to Pay section, click the Manage button.
- Provide the website URL and merchant business name.
- Click Update.
Result: the Click to Pay enrollment page confirms successful enrollment.
Enroll in Google Pay
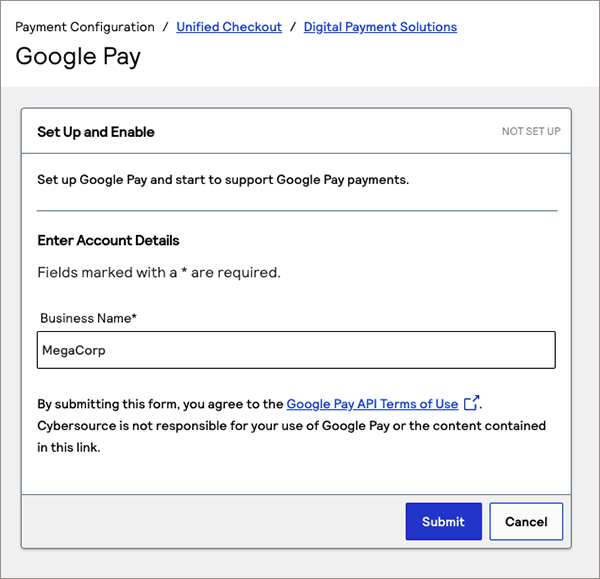
Merchants must enroll in Google Pay before it functions in .
Follow these steps to register the merchant with Google Pay:
- Log in to the .
- Go to Payment Configuration > .
- Click the Manage button.
- In the Google Pay section, click the Manage button.
- Provide the merchant business name.
- Read the Terms of Use.
- Click Update.
Result: the Google Pay enrollment page confirms successful enrollment.
Enroll in Paze
Merchants must enroll in Paze before it functions in . This activity registers the merchant with Paze services.
Follow these steps to register the merchant with Paze:
- Log in to the .
- Go to Payment Configuration > .
- Click the Manage button.
- In the Paze section, click the Manage button.
- Provide the merchant business name and website URL.
- Click Update.
Thanks for your feedback!
Last published: November 18, 2026